Custom Bathroom Vanities: Sizes, Styles and What They Cost
A custom vanity should fit the people, plumbing, and walls in your bathroom. Here are the dimensions and decisions to settle before a cabinetmaker starts cutting.
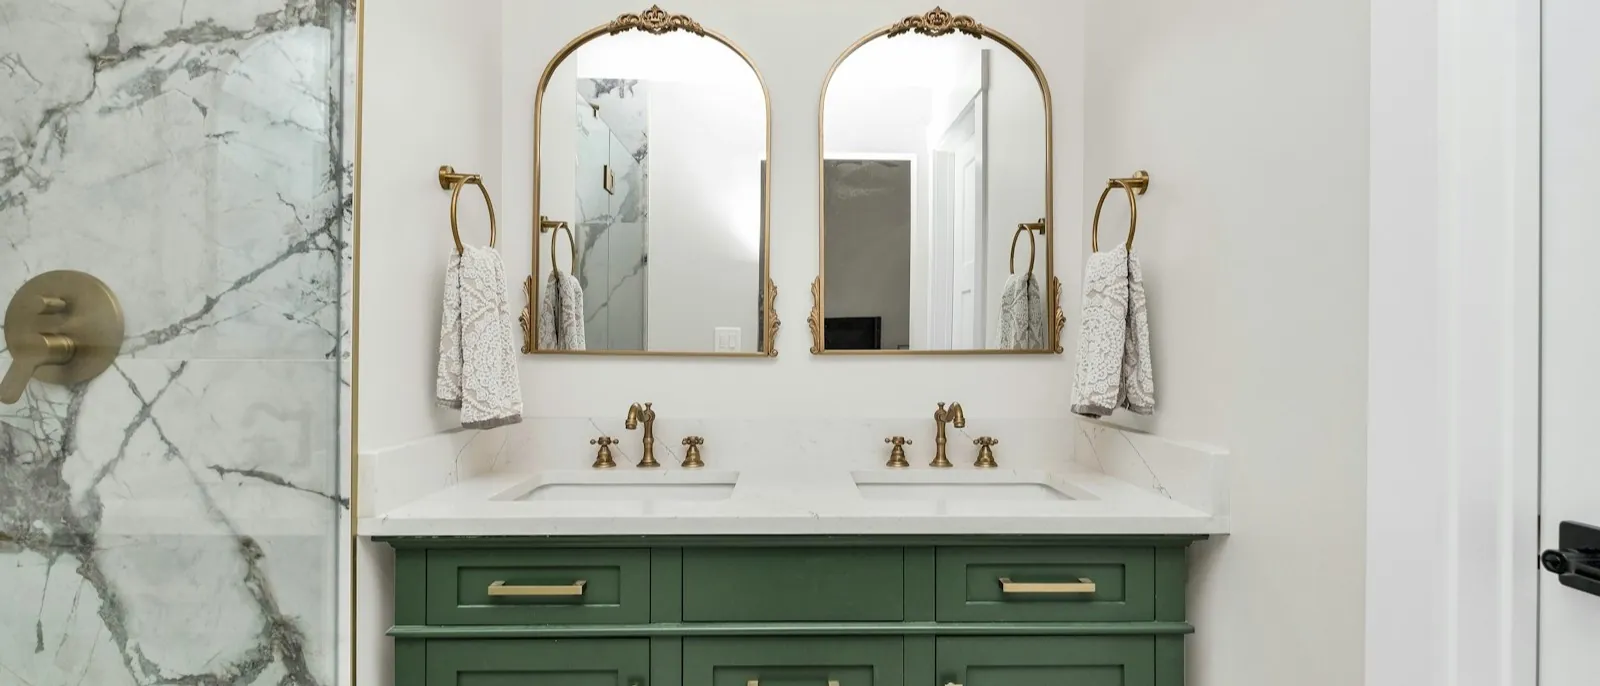
The expensive mistake happens before the vanity is built.
Somebody approves a handsome elevation. Then the sink bowl steals your top drawer, the drain lands smack in the middle of the next one, the bathroom door clips a pull, and the finished counter sits too high for you every morning.
That's a handsome drawing and a lousy vanity.
A custom vanity should solve those problems before the first board is cut. It has to fit your room, your plumbing, and the way you live as one piece of work.
That's the work this guide covers. You won't find stock cabinets or freestanding vanity packages ranked here. Those are boxed products. We're talking about custom-built cabinetry fitted to a wall, designed around a sink, or mounted to float above the floor.
What makes a bathroom vanity custom
A custom bathroom vanity starts with measurements from your room and ends with a cabinet made for those measurements. Your width, depth, height, drawer layout, sink location, plumbing openings, finish, fillers, and mounting details can all change.
That doesn't mean every inch needs a clever trick. Your best custom work will often look simple because somebody handled the awkward parts quietly.
A fitted vanity can run from wall to wall without leaving useless slivers at the sides. A custom vanity cabinet can narrow beside your door casing, grow deeper where the aisle allows it, or shift a drawer bank away from an existing drain. It can also match medicine cabinets, linen storage, or paneling elsewhere in the room.
Before you pay for custom work, find out what the shop will actually customize. Some lines offer fixed cabinet sizes with a choice of doors and finishes. That can be useful, but it isn't a cabinet drawn around your room and plumbing.
Ask to see the plan view, front elevation, and at least one section through the sink. If the builder can't show you what happens behind the drawer fronts, you don't have a finished design yet.
Measure the room before choosing the look
Start with the walls and everything that moves through them.
Measure the available width at the floor, counter height, and above the backsplash. Check both side walls for plumb. Then record your supply lines, drain, outlets, switches, vents, baseboard, door casing, window trim, and existing lighting.
Now test the moving parts:
- Entry-door swing
- Shower-door swing
- Toilet clearance
- Drawer and cabinet-door opening
- Cleaning access at each side
- The route needed to carry the finished cabinet into the room
NKBA recommends 30 inches of clear floor space from the front edge of a lavatory to the opposite fixture, wall, or obstacle. Its freely available guide cites 21 inches as the code minimum in the edition it references. Local rules can differ, and an accessible bathroom can require more.
That difference matters. Your plan can scrape past the minimum and still feel cramped every morning.
Width
Your room should decide the custom width, not a retail size chart.
Your wall-to-wall work needs planned fillers or scribe material so the installer can fit crooked walls without forcing the doors and drawers out of alignment. If the vanity stops short of the wall, leave enough space beside it to clean and enough visual room to make your choice look deliberate.
For two sinks, NKBA recommends at least 36 inches between lavatory centerlines. Its cited code minimum is 30 inches. The same guide recommends at least 4 inches between the edges of two freestanding or wall-hung lavatories.
Those numbers start the layout. Your sink-bowl width, faucet reach, counter space, drawer banks, and morning routine decide whether two sinks will actually be useful.
Depth
A 21-inch-deep vanity cabinet is common. Add the top and its overhang, and the finished depth grows.
That depth can be too much in a powder room or a bath with a tight door swing. A custom shop can build a shallow cabinet, as shallow as roughly 16 inches, but the sink, faucet, trap, drawers, and supply stops all have to fit inside the reduced space.
Don't approve "21 inches deep" until you know what it describes. The cabinet box, door face, and finished countertop don't share the same depth.
Height
There's no useful height until you name the user and the sink.
NKBA's planning guidance puts lavatory or vanity height between 32 and 43 inches to fit you. Many finished vanities land in the narrower 32-to-36-inch band, but that habit shouldn't overrule the people in your house.
Measure the finished height to the surface you reach. For an undermount sink, that's generally the countertop. A vessel sink sits above the top, so your cabinet may need to be lower to keep the rim comfortable.
If you need seated use or accessibility, bring it into the first drawing. Your knee clearance, pipe protection, faucet reach, mirror height, and local accessibility rules affect a great deal more than the cabinet box.
Choose the sink before the drawers
The sink isn't a countertop accessory. It eats cabinet space.
Give the cabinetmaker the exact sink model, faucet configuration, and rough plumbing information before the final shop drawing. "One undermount sink" doesn't tell the shop nearly enough. Bowl width, depth, front-to-back position, drain location, overflow, faucet holes, and disposal of the trap all change the storage below.
Undermount, drop-in, and integrated sinks
An undermount sink hangs below the countertop. You get a clean counter edge, but the bowl and its mounting hardware may swallow the top drawer zone.
A drop-in sink rests on the top. It may simplify some installations, yet the bowl still projects below the counter.
An integrated sink and top arrive as one assembly or coordinated system. That can reduce seams, but you still have to coordinate the drain and cabinet openings.
In all three cases, put the actual cutout and bowl profile on the cabinet drawing.
Vessel sinks
A vessel sink sits above the counter. That makes finished height the first question, not the last.
Choose the sink before you set the cabinet height. Then confirm faucet height and reach, drain location, cleaning space behind the bowl, mirror position, and whether the top needs one hole or several.
Get the sequence backward and you wind up with a tall stack of cabinet, stone, and bowl that looked balanced on paper and feels awkward every time you wash your hands.
One sink or two
Two sinks are useful when two people truly use them at the same time and the room is wide enough to leave elbow room and storage.
One sink can be the smarter custom choice in a modest room. It keeps a longer stretch of counter, cuts down on plumbing, and leaves you more freedom for drawers. A 60-inch vanity with one sink and a wide drawer bank can store more useful things than the same width split around two bowls.
Count routines, not residents. If one of you showers while the other uses the sink, that second bowl may cost you storage without solving a single conflict.
Make the plumbing and drawers share the cabinet
Doors hide plumbing easily. Drawers make better use of the cabinet.
There's your central custom-vanity problem.
Your cabinetmaker can use a shallow top drawer, a U-shaped drawer around the drain, split drawers on each side of the bowl, or a separate drawer bank beside the sink. The right choice depends on the exact sink and pipe locations.
Keeping the existing plumbing isn't always worth it. Moving a drain can cost more, but it may buy you a full stack of drawers that works every day for the life of the bathroom. Have the cabinetmaker and plumber price both versions before you accept a compromised layout.
Put service access on the drawing too. Shutoff valves and trap connections can't be buried behind a drawer nobody can remove.
Decide what your storage must hold:
- Tall bottles and cleaning supplies
- Hair tools and their cords
- Makeup and medicine
- Towels
- Spare paper products
- A hamper, scale, or waste bin
Measure the tall items. A label that says "deep drawer" won't tell you if the bottle stands up.
Fitted, furniture-style, or floating
These are construction decisions before they're style decisions.
Wall-to-wall fitted vanity
Your fitted vanity uses the entire run and closes the side gaps with scribed fillers or finished panels. You get the most cabinet width, and an awkward alcove starts looking deliberate.
The installer needs enough filler beside the walls for doors and drawers to clear casing, uneven plaster, and out-of-square corners. That perfect zero-gap rendering may be impossible to install.
Furniture-style custom vanity
A custom furniture-style vanity stands on legs or a shaped base but is still designed and built for your room. It can feel lighter than a full plinth and show more flooring.
It still needs secure attachment, plumbing coordination, and a plan for the wall behind it. "Looks freestanding" doesn't mean "leave it loose."
This is custom millwork, not a roundup of freestanding retail products.
Floating custom vanity
A floating vanity custom-built for the room can make your floor line feel longer, ease cleaning, and put the cabinet at a height chosen for you.
It also transfers the cabinet, top, sink, and daily loads into the wall. The bar here is high: even for one of its leg-supported console vanities, a cabinet whose weight rests on the floor, Kohler's installation instructions require securing the rear rail to two or more studs, or to 2x6 support behind the finished wall. A fully floating cabinet hands the wall everything, so your custom design needs its own engineered support and fastener specification.
Set that requirement before tile or drywall closes the wall. Put these items on the plan:
- Blocking or stud locations
- Rear-rail or bracket design
- Required fasteners and attachment points
- Cabinet, top, and sink weights accounted for
- Supply and drain routes through the supported area
- A level and plumb mounting surface
Don't let "floating" turn into a cabinet hung from drywall anchors after the tile is finished.
Materials and finish in a wet room
A bathroom vanity lives beside water, steam, cosmetics, and cleaning products. Make the shop name the material and finish for the cabinet box, finished ends, doors, drawer fronts, drawer boxes, toe kick, and fillers.
Painted and stained vanities are different jobs. Paint-grade work may combine stable sheet goods with solid edging and trim. With stained work, veneer matching, grain direction, solid edging, and sample approval all matter more.
Look closely at the bottom edges around the sink cabinet and toe kick. Confirm how the exposed edges are sealed, how you'll wipe up spills, and whether the finish warranty covers bathroom use.
Door style affects cleaning and price. A simple Shaker door is common because it works with painted or stained finishes without putting heavy carving around a splash zone. Our Shaker cabinet guide covers proportions, paint versus stain, and the details that separate a crisp door from a flimsy imitation.
Approve a labeled finish sample in the bathroom's actual lighting. Whites change beside tile. Wood tones shift under warm and cool bulbs, and the hardware can change the color of the whole composition.
What a custom vanity costs
Use $1,000 to $4,000 for the custom cabinet and its installation as a rough planning range for a conventional project. That's HomeGuide's combined figure and the highest floor of the three national guides; Angi's and HomeAdvisor's components start around $600 to $700 combined.
Now, stop and read what that number doesn't promise.
Current national guides package the job differently. HomeGuide lists a custom unit at $500 to $3,000, custom installation at $500 to $1,000, and a combined $1,000-to-$4,000 range. Angi lists a custom unit at $400 to $3,000 plus $200 to $1,000 for installation. HomeAdvisor puts custom construction at $500 to $2,800 and installation at $200 to $1,000.
All three treat at least some other parts as separate costs.
| Cost line | Rough national planning range | Confirm in the quote |
|---|---|---|
| Custom cabinet unit | $400 to $3,000 | Size, material, drawers, finish, and hardware |
| Cabinet installation | $200 to $1,000 | Delivery, scribing, mounting, fillers, touch-up, and cleanup |
| Vanity top | $250 to $3,000, or about $5 to $200 per square foot depending on estimator and material | Template, fabrication, cutouts, backsplash, delivery, and installation |
| Plumber | About $45 to $200 per hour | Disconnect, new rough-in, relocation, sink, faucet, and final connections |
| Old vanity removal | About $115 to $500 | Countertop removal, hauling, disposal, and wall damage |
These are broad national estimates, not a cap. A long double vanity with a furniture-grade finish, fitted panels, shaped drawer boxes, stone, two sinks, and concealed floating support can sail beyond the summary range.
The choices that move the cabinet price fastest are width, drawer count, door and panel detail, wood and finish, wall-to-wall fitting, floating support, and the number of coordinated pieces.
Two quotes can differ by thousands and still describe different scopes. Our custom cabinet cost guide shows how material, finish, hardware, design, and installation change a custom bid.
Who should build and install it
Start with a cabinetmaker or custom millwork shop that can show you fitted bathroom work. A furniture builder may also be right for a legged or highly detailed piece. If you want a floating installation, the portfolio should include wall-mounted cabinetry with documented support details.
A plumber usually handles the supply, drain, sink, and faucet work. A countertop fabricator may template and install stone or solid-surface tops. A general contractor can coordinate those trades when your vanity is part of a full bathroom remodel.
You still need one person to own the dimensions.
Ask your team who verifies the sink model, gives the cabinet drawing to the plumber, approves the top template, and makes the call if the drain misses a drawer opening. "The other trade handles that" is how a two-inch conflict survives all the way to installation day.
What to put in the quote
Give each bidder the same measured room, sink model, faucet, finish direction, and storage list. Then get these items in writing:
- Overall cabinet width, depth, height, and finished counter height
- Sink, faucet, and drain locations
- Cabinet, door, drawer, back, filler, and toe-kick materials
- Drawer layout around the bowl, trap, and shutoff valves
- Door style, finish system, hardware, and sample approval
- Wall-to-wall scribing or finished-end details
- Floating support, blocking, and fasteners when applicable
- Countertop, sink, faucet, backsplash, and plumbing inclusions
- Removal, wall repair, floor or trim work, delivery, installation, and cleanup
- Shop drawings, approvals, change orders, payment schedule, warranty, and lead time
You should be able to point at every visible surface and every trade and find it somewhere in the price.
Questions people actually ask
How much does a custom bathroom vanity cost?
Plan on roughly $1,000 to $4,000 for a conventional custom cabinet and its installation. That's HomeGuide's combined range; other estimators' components start around $600 to $700. The top, sink, faucet, plumbing changes, old-vanity removal, backsplash, and wall repair may be separate. Long, double-sink, furniture-grade, or floating projects can exceed that range.
What is the best height for a custom vanity?
The best finished height fits the primary users and the sink type. NKBA planning guidance spans 32 to 43 inches. Many vanities finish around 32 to 36 inches, but a vessel sink may require a lower cabinet because the bowl sits above the top. Accessibility needs can require a different layout.
How deep should a custom vanity cabinet be?
About 21 inches is common for the cabinet before the countertop overhang. In a tight bathroom, custom work can reduce the cabinet to roughly 16 inches, provided the chosen sink, faucet, trap, drawers, and supply valves still fit.
Can a custom vanity be wall mounted?
Yes. A floating custom vanity needs a support plan tied to studs or blocking behind the finished wall, plus coordinated fasteners and plumbing routes. The exact design depends on the cabinet, top, sink, wall framing, and loads. Set it before drywall or tile closes the wall.
Is one sink or two better?
Two sinks help when two people use them at the same time and the room can preserve counter space, elbow room, and storage. One sink often gives a modest-width vanity more uninterrupted counter and better drawers. For two sinks, start with NKBA's recommended 36 inches between centerlines and test the actual bowls and routines.
Where these numbers come from
Clearances, sink spacing, and user-fit height come from the National Kitchen & Bath Association bathroom planning guidelines. NKBA's current planning-guideline page says its fifth edition was prompted by the 2024 IRC; the freely available PDF cites the 2015 IRC, so confirm current local code before construction. The common 21-inch vanity depth and the 16-inch shallow option come from NKBA's generic cabinet nomenclature.
Wall-attachment practice comes from Kohler's installation instructions for a wall-secured console vanity. It's a leg-supported design whose rear rail still requires two or more studs or 2x6 blocking. Measuring and fixture coordination are also informed by Kohler's vanity buying guide.
Cost components come from current guides published by HomeGuide, Angi, and HomeAdvisor. Their scopes differ, which is why the quote checklist separates the cabinet, top, fixtures, installation, plumbing, and removal.
Prices vary by region, shop, material, finish, and site conditions. Dimensions must be confirmed against the actual users, room, fixtures, plumbing, and shop drawings.